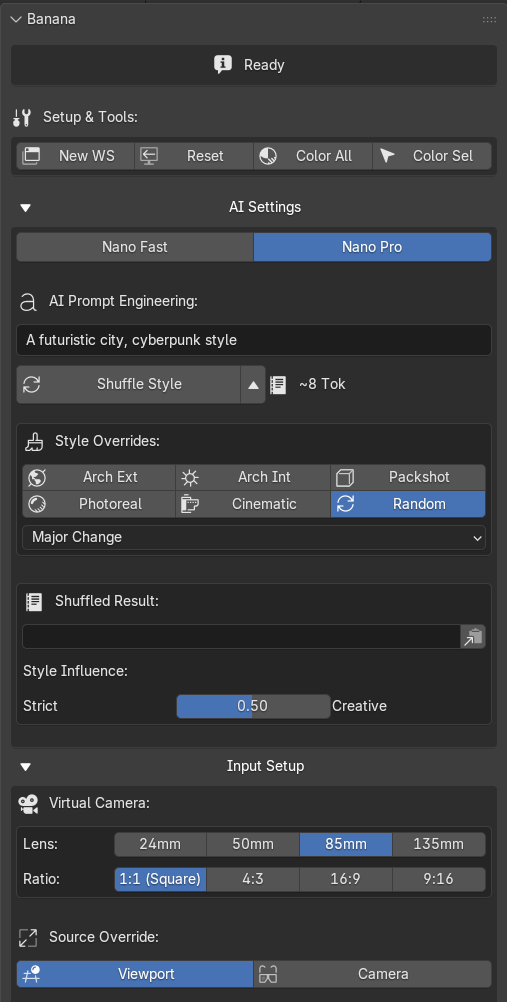
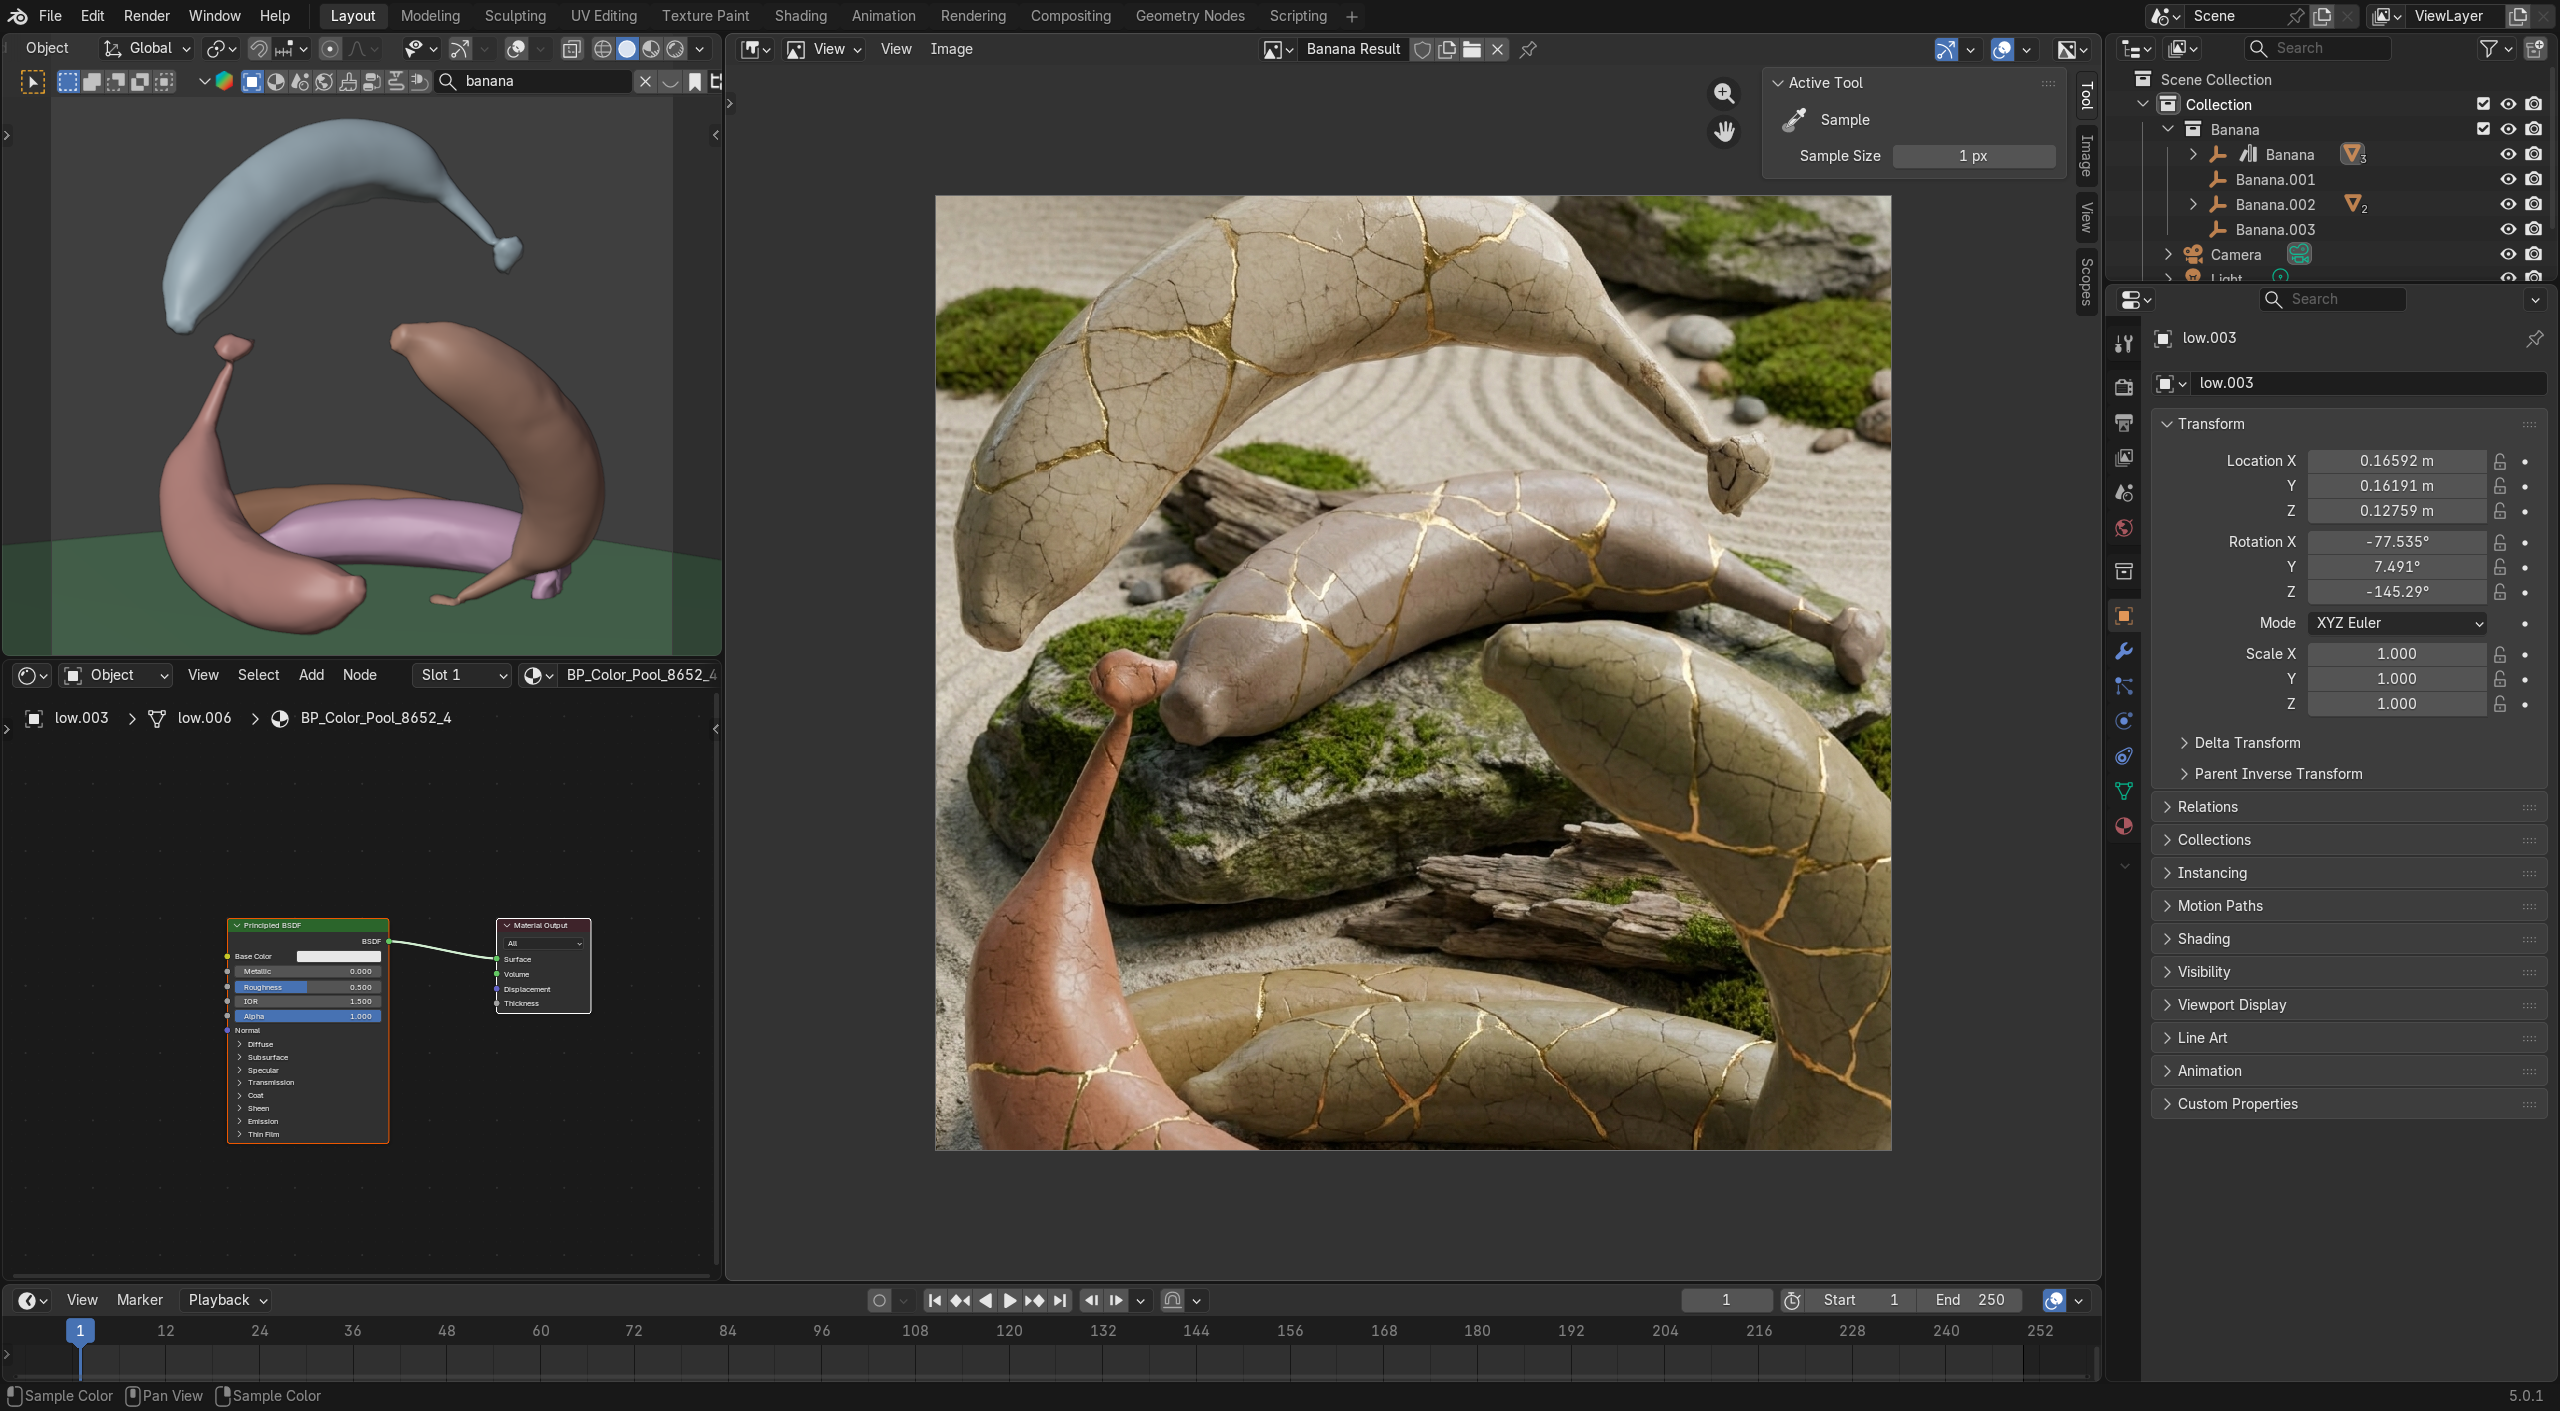
From a fresh install to your first AI render takes about five minutes. This walkthrough covers every control in the panel — what it does and when to reach for it.
Nano Banana Pro 3 works best in its own workspace, with objects the AI can clearly tell apart. Two buttons handle both.
Creates a dedicated Nano Banana workspace in Blender — a clean viewport layout with the add-on panel open in the sidebar, ready for capture. Your existing workspaces stay untouched.
Assigns a distinct flat color to every object in your scene. This is how the AI tells your objects apart — clearly separated colors mean cleaner, more faithful transformations.
The add-on renders through Google's Gemini image AI, so it needs an API key (free tier available) and an internet connection. Paste the key once in the add-on preferences — it's stored locally.
The top half of the panel is where you describe what you want and how much freedom the AI gets.
Fast is cheap and quick — perfect for exploring. Pro produces the highest-quality output for final frames.
Plain language works: "brushed copper, soft studio light" or "Van Gogh impasto, starry night palette". The prompt combines with whatever preset is active.
Arch Ext · Arch Int · Packshot · Photoreal · Cinematic · Random — curated starting points for the most common jobs. Random is great for happy accidents.
Strict keeps the AI close to your viewport: same forms, same layout, restyled surfaces. Creative lets it reinterpret the scene more boldly.
Major shuffles toward a bold new direction. Minor riffs subtly on the current result — use it when you're close and want variations.
Choose a focal length — 24mm, 50mm, 85mm or 135mm — and an aspect ratio. The AI honors the lens character you pick, from wide-angle drama to portrait compression.
Capture exactly what you see in the viewport, or switch to the active scene camera for a precisely framed shot.
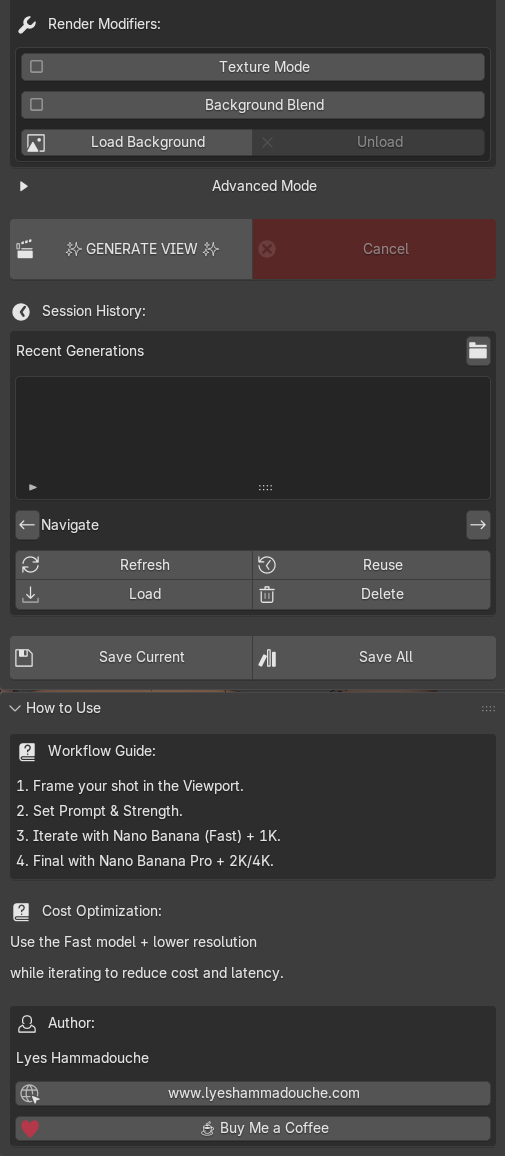
Hit Generate View and the add-on captures your viewport, sends it to Gemini with your prompt and settings, and drops the result into your session history. A simple two-phase habit keeps API costs close to nothing:
Iterate freely on style, prompt and shuffle at the lowest cost per image. Most of your generations happen here — make them cheap.
Once a direction is locked, switch up and generate the keeper at full quality. One expensive render instead of forty.
The bottom half of the panel holds the modifiers — switches that change what the AI is allowed to touch.
Preserves the materials you authored in Blender. The AI restyles lighting, mood and environment around your objects but never repaints their surfaces — essential when brand colors or fabric textures must survive.
Composites your subject into a reference image. Load any photo or render as the target environment and the AI places your objects inside it, matching light direction, color temperature and reflections.
Load picks the reference image for Background Blend; Unload clears it and returns to prompt-driven environments.
Every render is auto-saved the moment it arrives — nothing is ever lost to an accidental click.
Renders are stored automatically in a banana_history/ folder next to your .blend file, so they travel with the project.
Step back and forth through the session, bring any earlier render back as the current result, and branch from it with Minor Shuffle or a tweaked prompt.
Remove individual renders from the history when an experiment doesn't pan out — keep the folder tidy without leaving Blender.
Blender 4.0+, a Gemini API key, and an idea. That's the entire requirements list.